Call 01202 43 43 40
Email info@mesmo.co.uk
Here is a little know time management tip for arranging external meetings using Microsoft Outlook. Email part of your calendar to those with whom you are arranging a meeting instead of laboriously typing out a list of dates and times etc. The email will just show the availability. Here is how to execute this time management tip using your Microsoft Outlook Calendar.
 2. From the pop-up menu Send Calendar via E-mail, complete the box as required by selecting the Date Range, eg Next 7 Days. You will see it only shows Free, Busy, Tentative etc. There is no fear of disclosing what is happening on busy days.
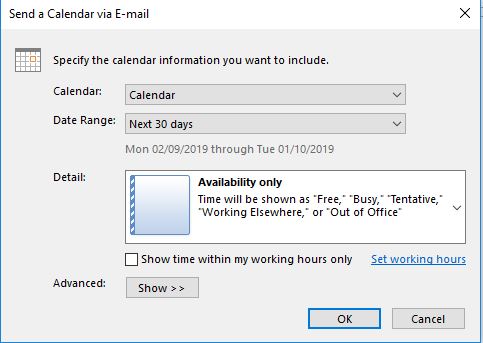
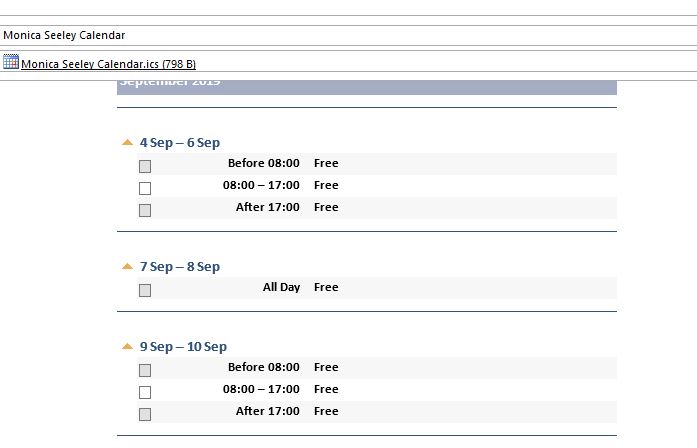
When complete click OK and the selected portion is automatically dropped into the body of email as show below.
Put all the names in the Bcc box to stop the endless rounds of Reply All emails. Then only you get all the responses and can decide on the best date. Just another tip to save time and reduce email overload as everyone plays email ping-pong back and forth with dates.
If you like this tip, it is just one of many which we cover in our Smart Email Management workshops. Why not contact us now to book one for you and your colleagues?
Tags: bcc, Meeting management to save time, Outlook calendar management, Reduce email overload, Time management
How to improve your time management and meeting management with the Outlook Schedular and reduce email overload. You’ve been tasked with organising a meeting with several attendees, let’s say 6. You set up a meeting and send it out without checking whether everyone can actually come! Now you end up with 5 responses telling you that either they are unavailable or would like to propose a new time. Needless time and energy wasted and frustration. Not only that, you have to keep track of all the responses and you really don’t have time for that!
Using Microsoft Outlook, the Outlook Scheduling Assistant makes it easy to manage your time and the meeting. It enables you to create meetings at the best time for all attendees ( assuming they are all at the same organisation) and easily track who has replied and more importantly what they replied. No need to trawl through your Inbox to see who has answered or remember to jot down the responses as they come in.
Set up the meeting and check attendees availability using the Scheduling Assistant and as soon as a reply arrives it is noted – you can see those replies all in one place too. Not only that, you can paste those replies into a Word Table or an Excel Spreadsheet as a checklist for the meeting.
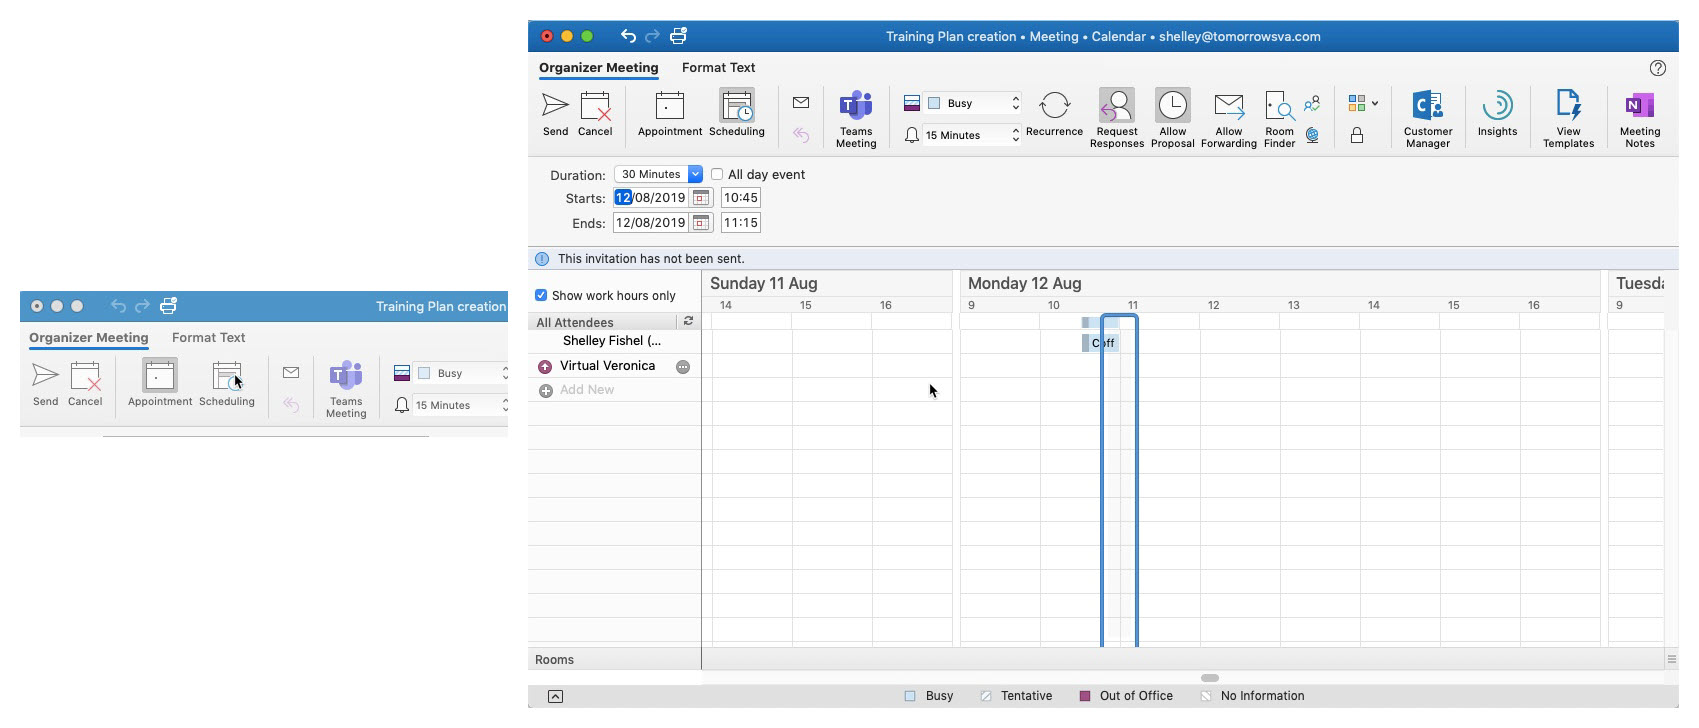
There is more functionality in Outlook 2016/Office365 on the Windows platform. The Scheduling Assistant does exist in the Mac version, however there is less advanced functionality as we will see.
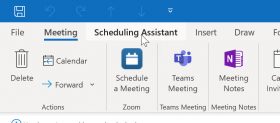
To get to the Scheduling Assistant first set up a meeting request. In the Calendar click on the New Meeting Icon and add the people you wish to invite. Set up the date and time and the topic of the meeting along with any notes you want to add in the body of the meeting such as the Agenda or any special instructions. Then click on the Scheduling Assistant Ribbon at the top of the screen:
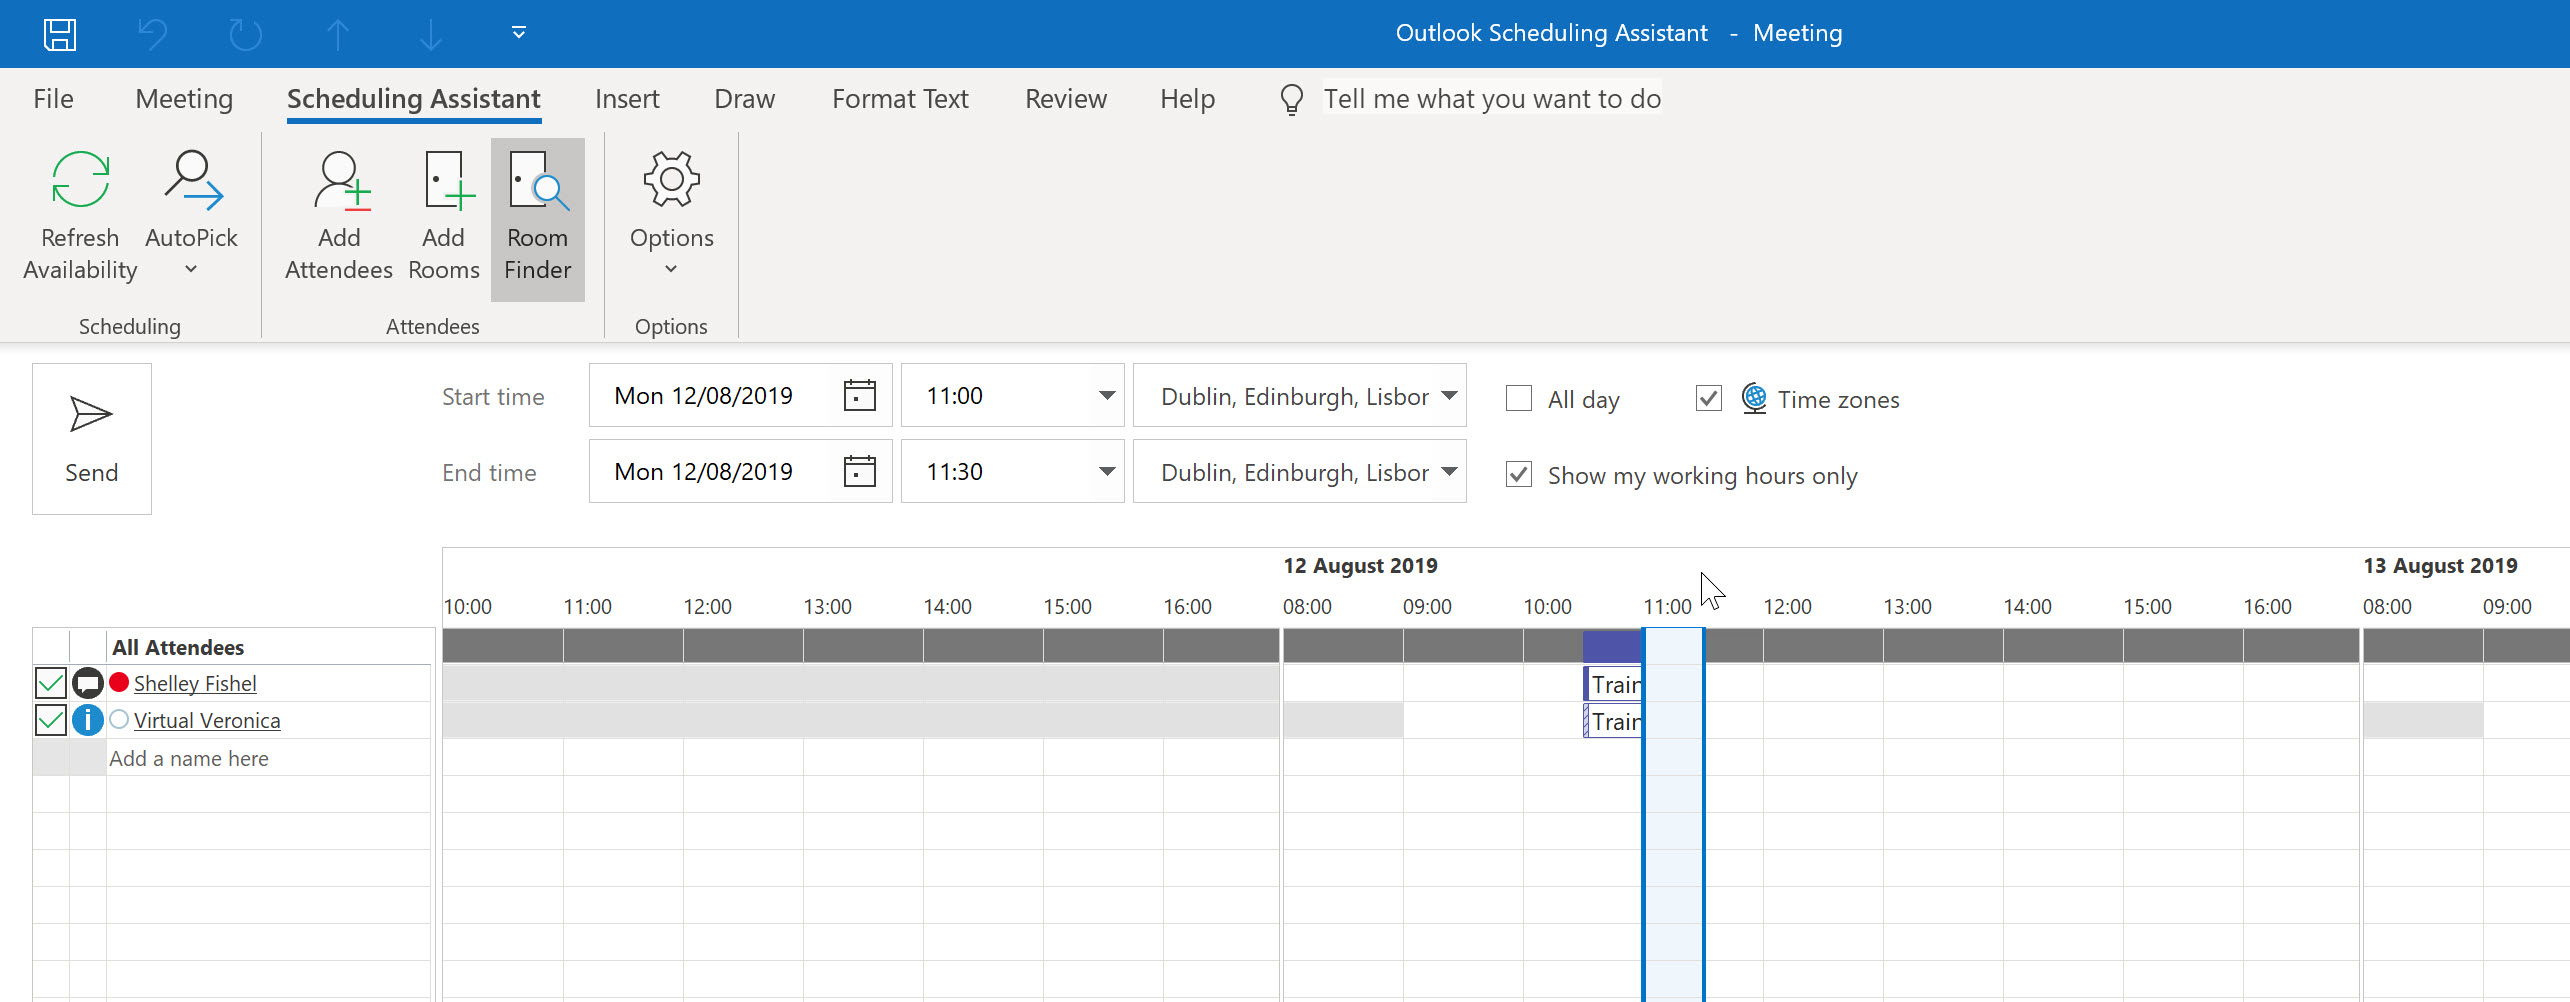
Once you are in the Scheduling Assistant screen, you will see a list of those invited along with a timeline showing you who is free and who is busy.

Here you can see:
Note that it only shows the schedules for people at your organisation – so anyone attending this meeting with @tomorrowsva.com in their email address. I can still invite others, who are not @tomorrowva.com however I won’t be able to check their schedule.
On the Scheduling Assistant Ribbon click the Auto pick next icon and Outlook will move the meeting to the next time slot where all attendees are available.
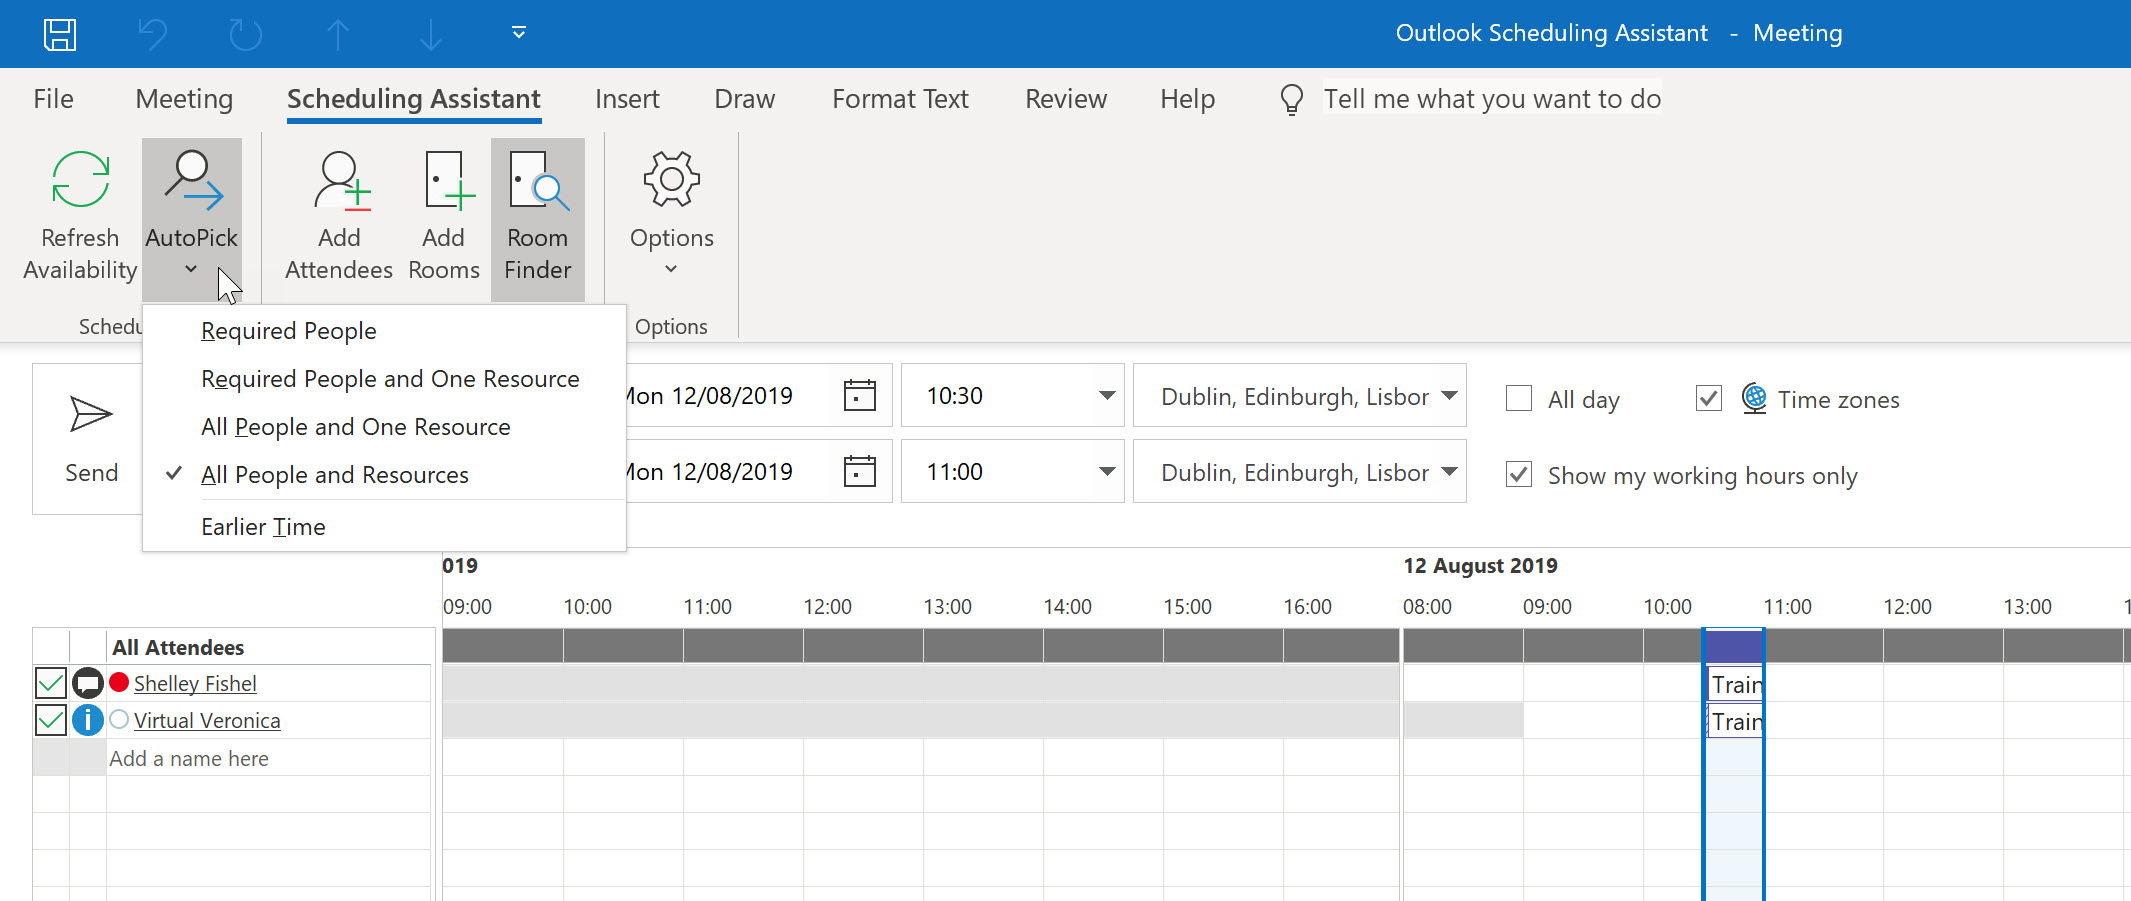
You will now be shown the next slot – in the image above I can see that 10:30 am is not the best time to meet up with Veronica so I will ask Auto Pick to find me the next free slot. The Scheduling Assistant now shows the next time we are both free – in this case 11 am.
You can continue to ask Outlook to AutoPick a new slot until you are happy with the meeting time. Alternatively you can drag the meeting to a new location or change the date and time manually. Click on the blue lines to select the meeting time and drag to the new location.
In case you want to add any more instructions or text to the body of the meeting request, click the Appointment icon. When you are happy with the meeting request, you can send it.
There is no AutoPick option so to change the meeting time, drag the meeting to a new time or change the time manually.
The first thing you will see is an email telling you how your attendee has responded
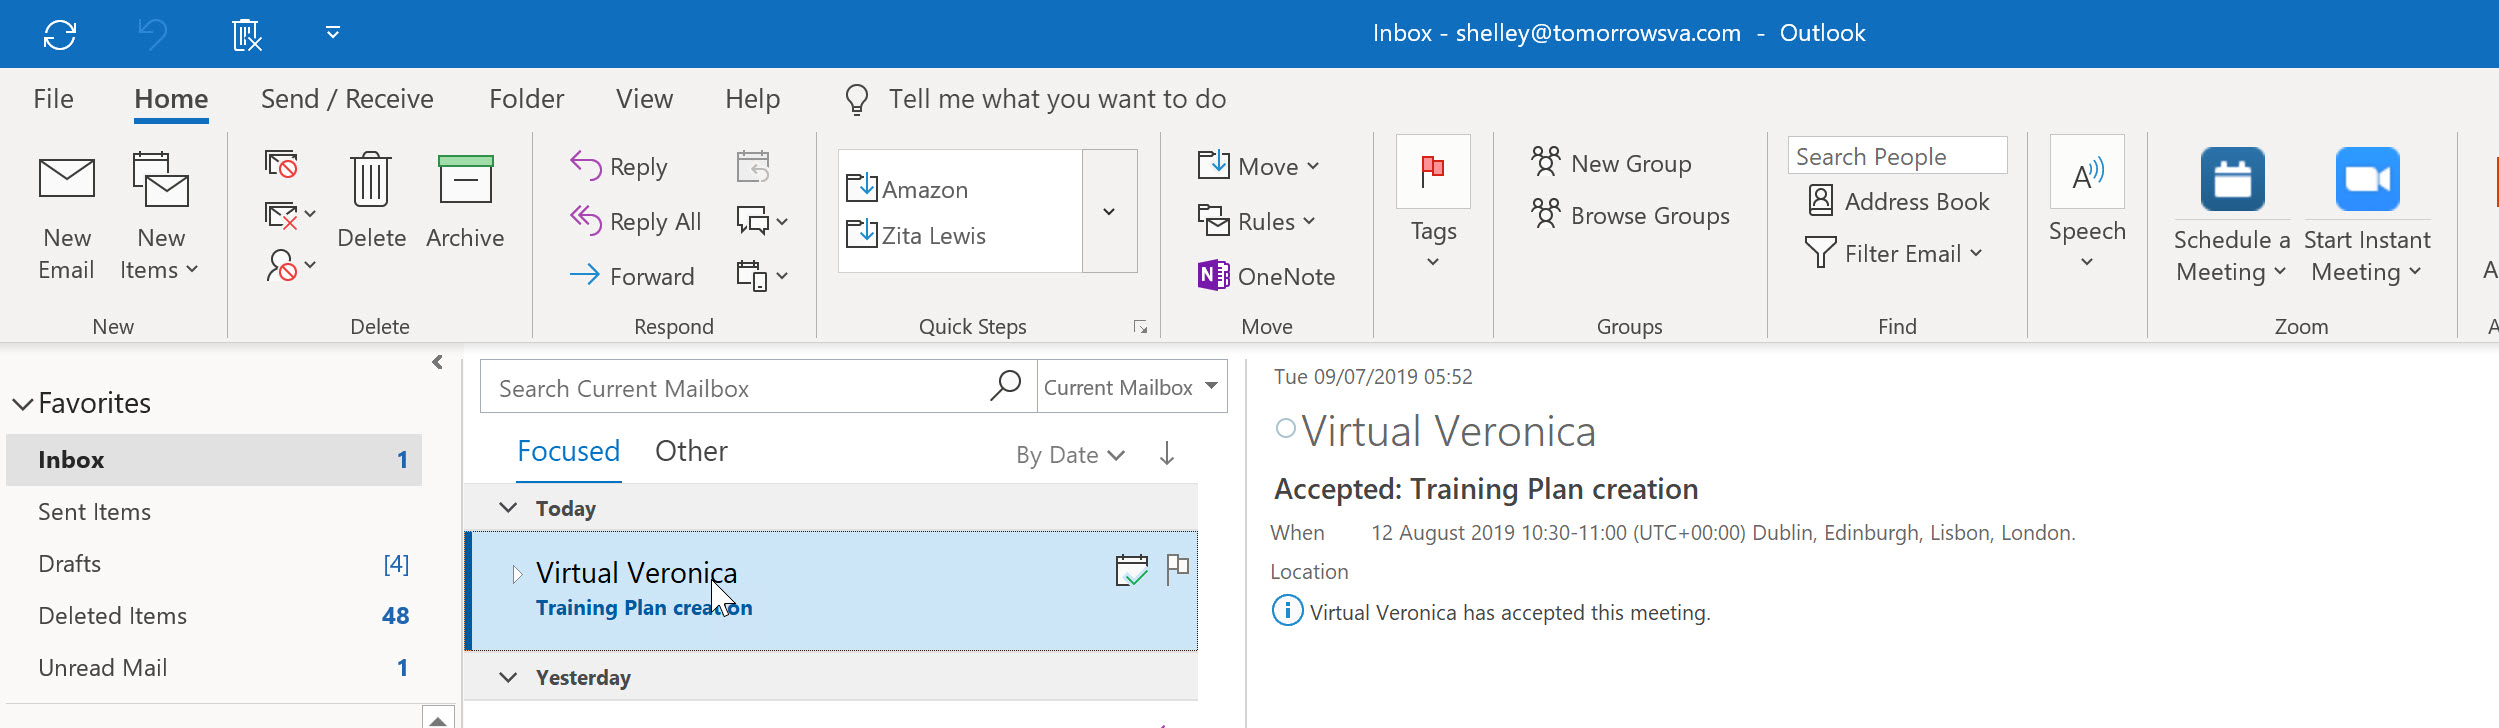
This can get lost quite easily in your Inbox as Inboxes can get VERY busy… To track the responses to your meeting invitation open the meeting in your calendar and click the Tracking Ribbon.

When you click Tracking, Outlook shows you a list of attendees and their responses.
Here you can see that Veronica has accepted and Shelley has had no response. No surprise there Shelley is the organiser!
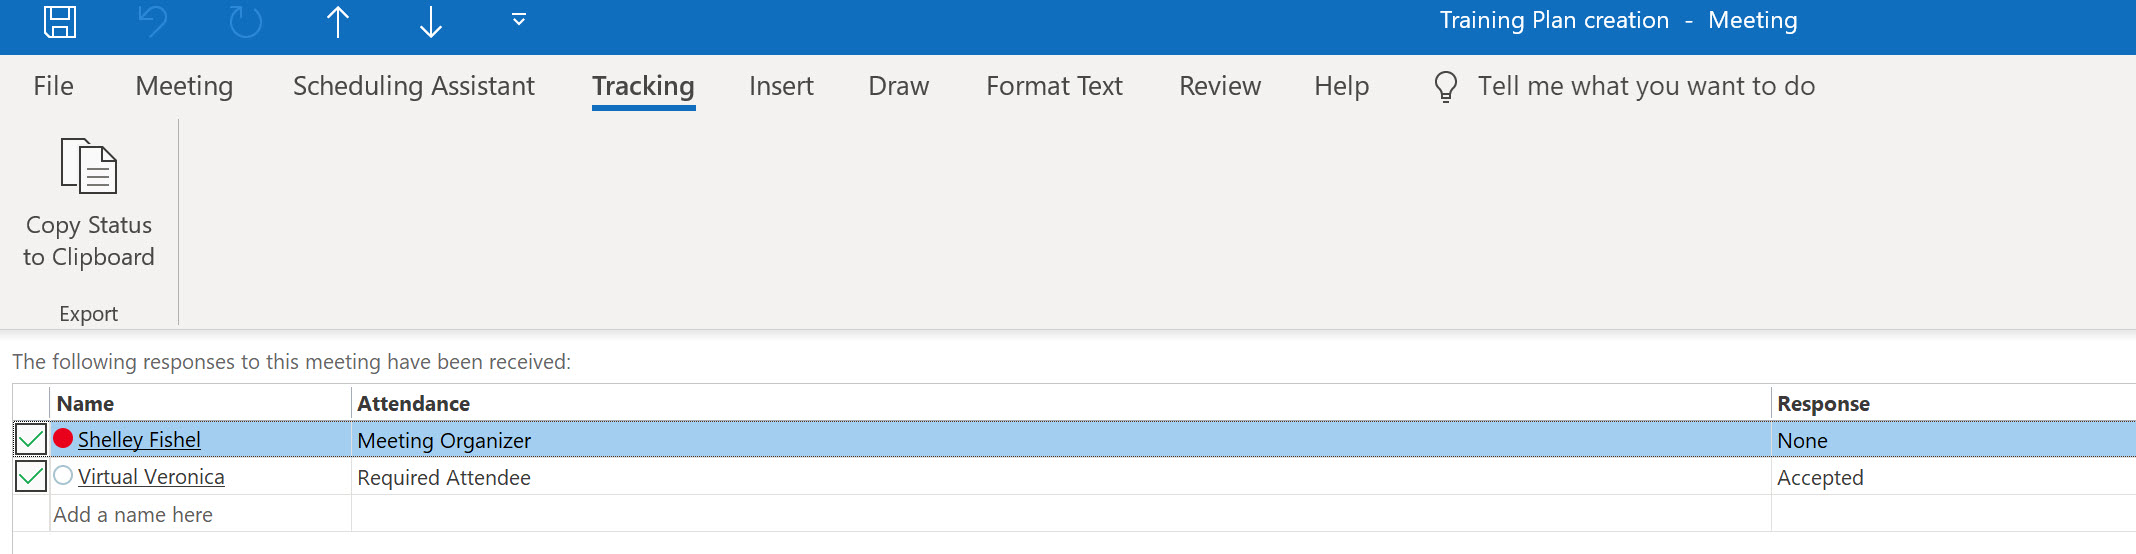
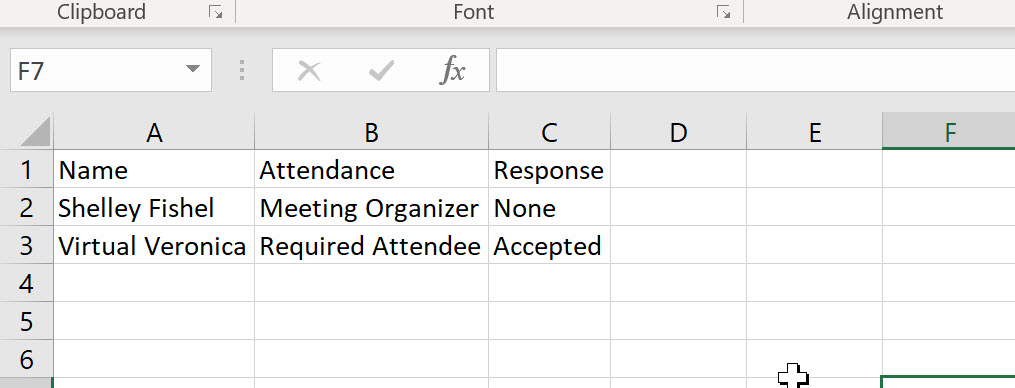
When you copy the tracking stats to the clipboard you can then paste it into a Word Table or an Excel Spreadsheet – you have a readymade checklist. Click the button to Copy Status to Clipboard and then open Excel and paste.
When you invite people to a meeting, they may not always be at the same organisation as you are. Even when you are not using the Scheduling Assistant as the Meeting Organiser you can still track the response from attendees. Click the Tracking Icon to see who is coming. Now that you can see the responses, you can nudge those who have not yet replied!
Using the Outlook Schedular you have saved time for yourself and those attending the meeting and significantly contributed to reducing email overload. Less stress and wasted energy leading to improved performance and well-bing.
Shelley Fishel is the founder of Tomorrow’s VA an online training academy for assistants.
Scheduler’s
Tags: Microsoft Outlook Scheduling Assistant, Reduce email overload, Shelley Fischel, Time management, Tomorrows VA